When I originally started this project, I had some fantasies about creating my own YouTube channel to document my musical inventions and their progress; it didn't take much experience, though, to conclude that videography entailed much more work than I wanted to do. Still, I wanted to share my ideas and efforts with whomever might be interested (there are a surprising number of makers of unconventional instruments out there, if widely scattered), thus my decision to include the rotola on my blog.
However, even doing this has been more of a challenge than I expected, largely because I find it very difficult to manage the split-focus required to maintain a record of my process while I am in that process. (I increasingly admire the folks who can maintain a video log of their work as they go; indeed, those that share about it say they actually have to focus on making a video first, then on its content.) So, you may notice that, as my posts have progressed, they have become not only more patchy in their content, but also more retrospective. I will complete my sharing of the balance of this instrument making project, but in the future, it might make more sense for me simply to post when I have completed a thing; I just can't keep proper track of all of it.
So, with all that said, here are bits of what I did to make the crank and the bow.
My initial visualization for the crank was for a relatively straightforward handle attached to a ring that clamped to the axle with a knob at the other end to hold while turning. I played with several designs for this and all of them either didn't look very good (one of which was vaguely obscene) or weren't sufficiently robust. After some time, I was struck with the idea that the crank didn't have to be a handle, but could be wheel-like, which solved the problem of robustness and opened new approaches for design. I came up with several designs I liked, but they were either too difficult to fabricate or did not match the overall look of the instrument. I finally settled on one that echoed design aspects of the stand:

The handle would be located near the rim between the cutouts (darkened areas). I liked this one a lot -- until it struck me that the cutouts looked a little too much like a certain famous cartoon mouse. I solved that problem by addressing another one: I hoped to make the cutouts exclusively with drill bits (as opposed to having to hand-draw individual curves)? You can see the solution in the next pic below.
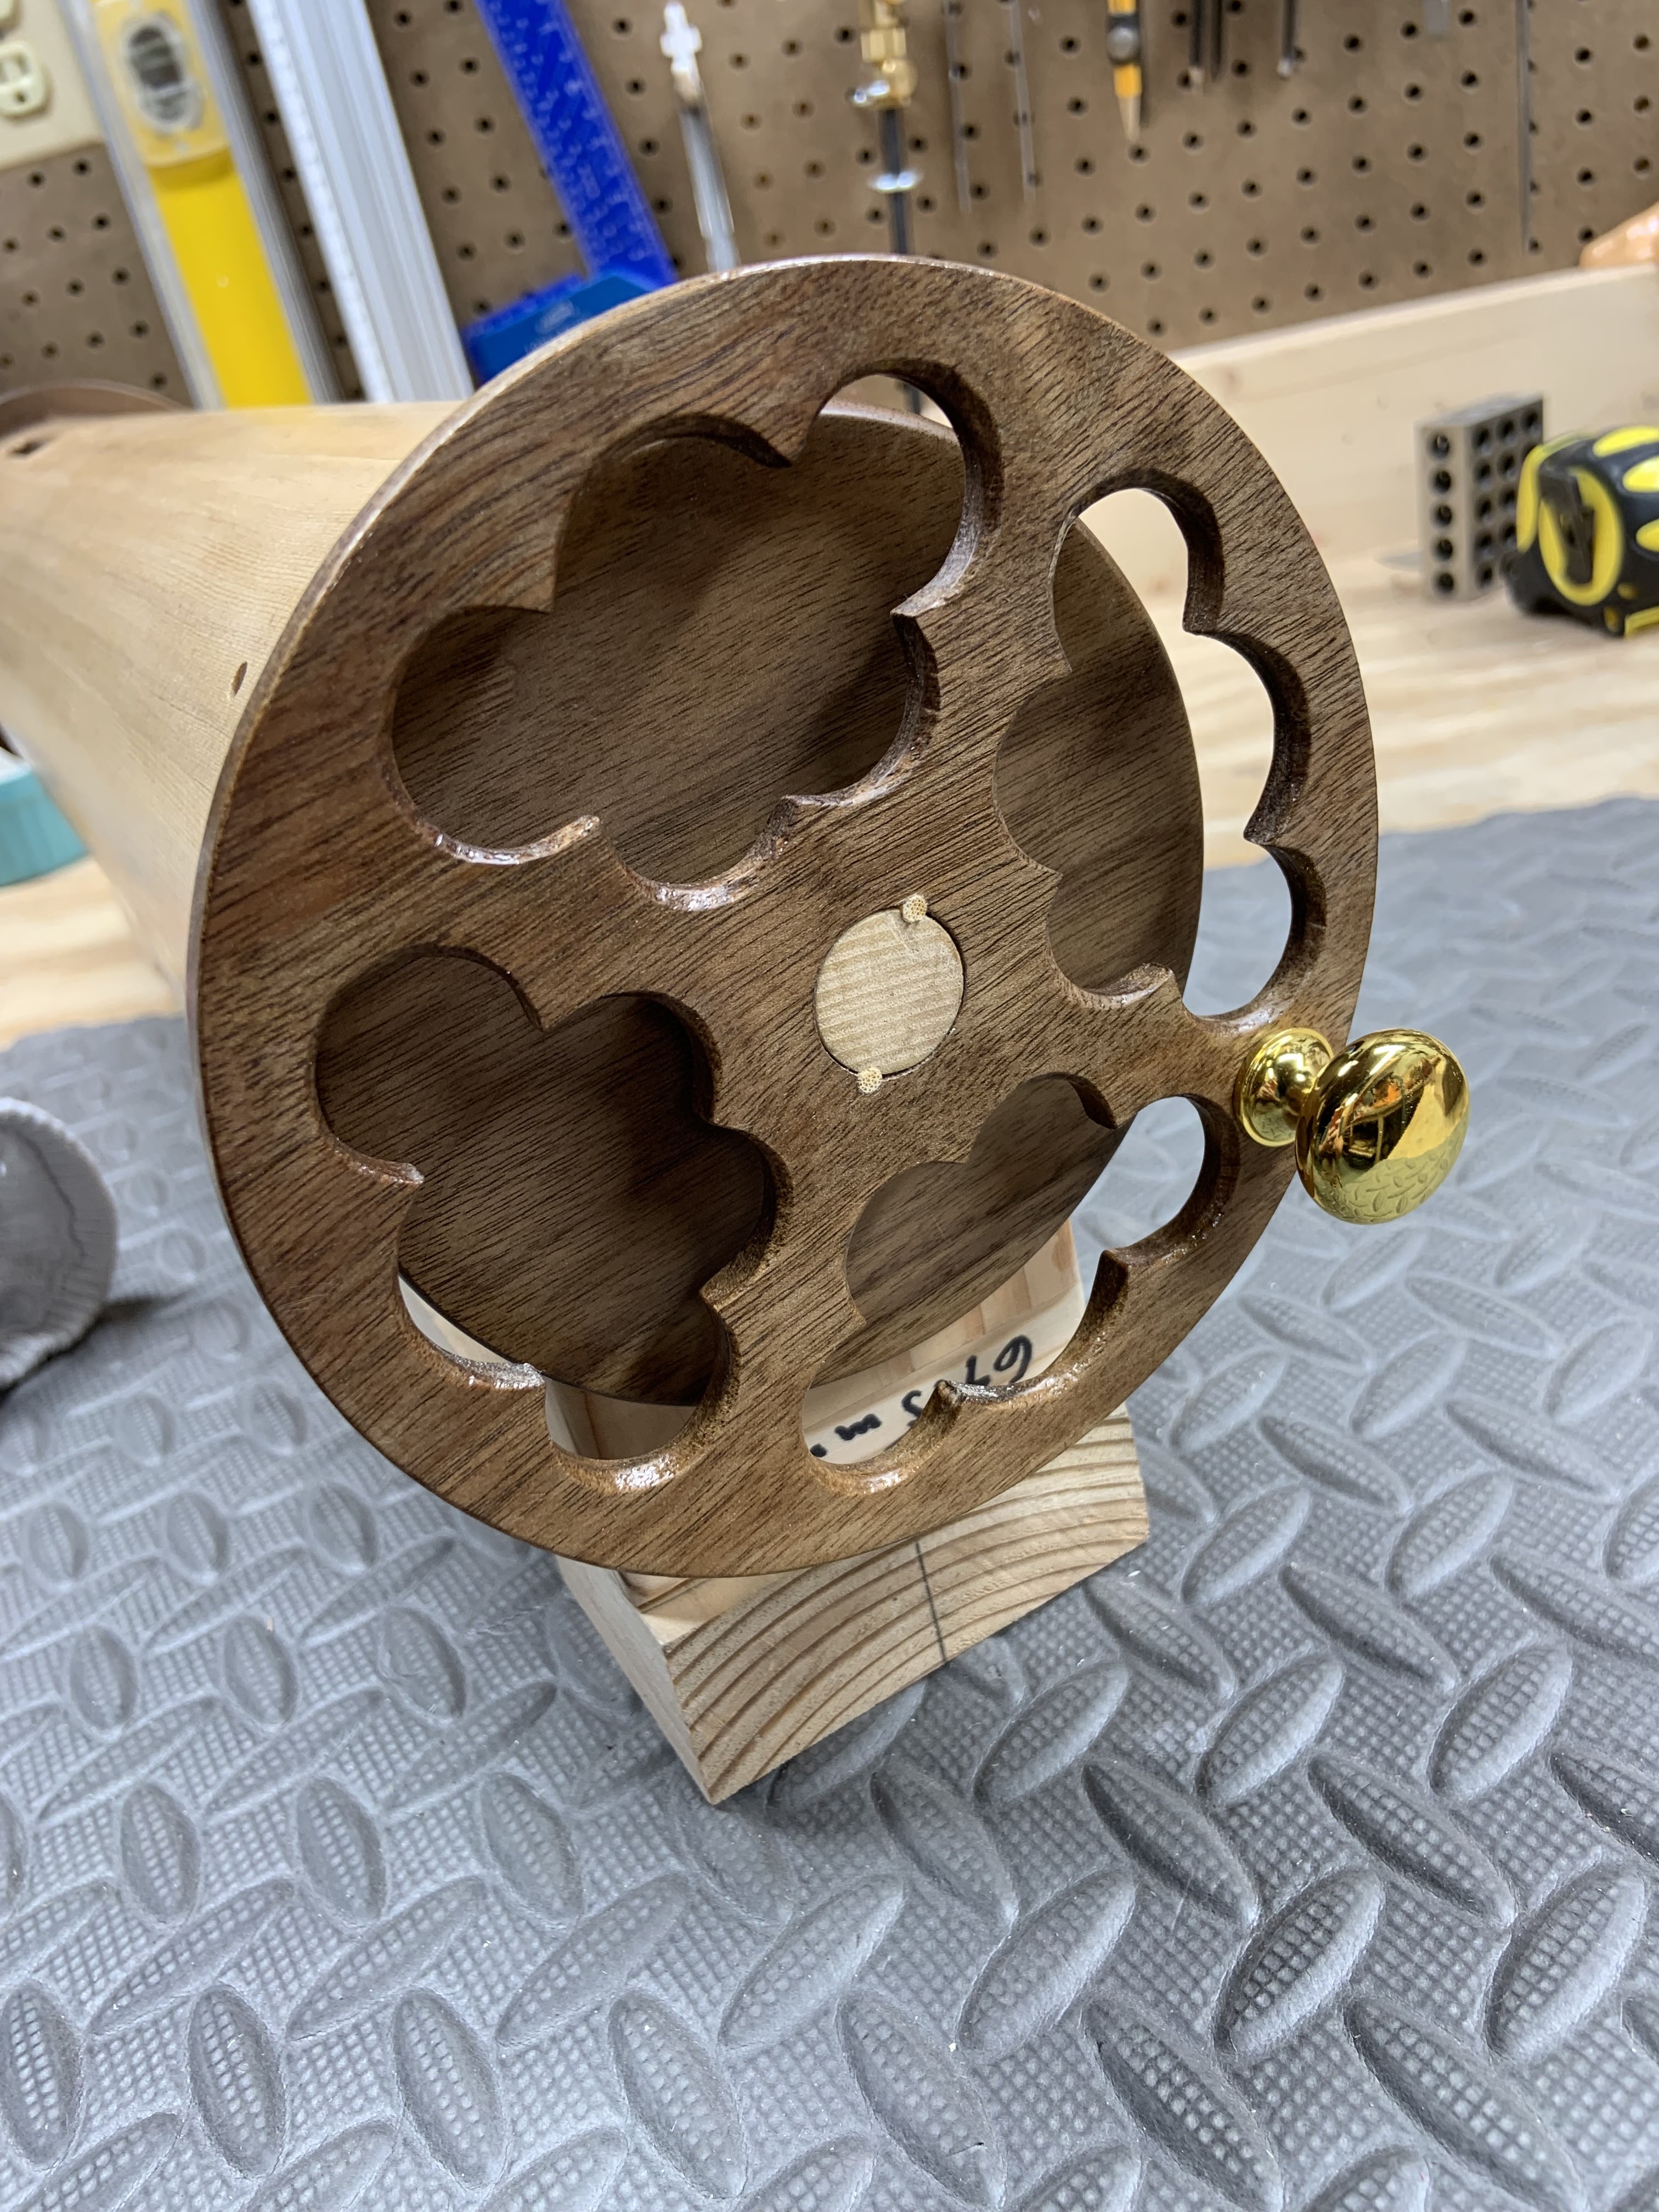
To create the crank, I first built a jig that kept the disc blank centered so that, after roughly cutting it out on the bandsaw, I could use the the oscillating belt sander to get the outside edge concentric with the axle hole. I then mounted the jig and disc on the drill press, where, guided by a printout spray-glued to the disc, I used two different sized Forstner bits to make the cutouts.
I wanted a chamfer on the inside edges to add interest and make the wheel look thinner. Here is a shot of that work in progress.
Workholding took some time to figure out, but, more importantly, I had never done that kind of free-hand, curved chamfering, so I picked which side would be the (less visible) inside and did that one first. The piece of walnut I was using was pretty brittle and splintery, making it especially challenging for a beginner. I'm very glad I started with the mostly hidden face, as there was not only workholding and carving techniques to sort out, but also learning which tool to use, how to hold it, and keeping it sharp. (I ended up mostly using a sloyd knife.) While the outside came out better, it's still best not to look to closely at it.
The end result. The two small dots next to the axle are bamboo pins; I wanted to keep the crank removable, but my local big box store did not have small enough brass screws, so I used some shish-kabob skewers to make a friction fit. It has worked fairly well so far.
The bow presented some unique problems. First, because I wanted it to wrap around the instrument and contact as many strings as possible, it necessarily would not be structured as bows typically are, placing tension on the horsehair to keep it taught. Instead, it needed to act more as a frame, anchoring the ends of the horsehair strands such that they could stretch around the instrument and press against the strings as they rotated through their arc of travel. This meant that the horsehair could not be attached to the bow (frame) as it might normally be, using the tension of the hair against the bow to keep it in place. I would have to come up with some system that both held the hair securely while allowing it to be removed and changed when it wore out, yet do so independently of the degree of tension on the hair at any given time (which would hang loose when not being used). I had some ideas for how to do this, but testing them would not be possible until after the second problem was solved.
That second problem was that, in order for the bow maximally to wrap the horsehair around the instrument, it would have to be semicircular. This presented strength issues, as there is no single cut possible from straight-grained wood in which the grain would follow the shape of the bow closely enough to prevent weak sections across the grain (this problem is called grain runout). My first solution to this was to glue together three pieces of wood, in this case walnut, to make an arc blank such that the grain more or less followed the curve of the bow; thus no part of the bow would have significant grain runout. I managed to get two pix of this attempt:
Here you can see the three pieces being butt-jointed together (just glued with no special joinery) to create the blank from which the bow will be cut; the cardboard template is in the foreground.
This rather blurry shot is the best image I have of the almost-finished bow (it's from the background of another pic). It has yet to have the attachment points for the horsehair cut into it, but it is otherwise complete. If you look closely, you can see the joints where the grain direction changes between sections.

The problem with this design is that, although it is unlikely to break due to grain runout, it actually did break several times -- under embarrassingly little stress -- at the joints, because butt-joints, especially with such thin wood, tend to be fairly weak. Additionally, I had trouble clamping them properly, which undermined the strength of the glue. A better solution would have been to have some sort of floating tenon connecting the sections, like splines or small dowels; these could even have been decorative, using a contrasting light-colored wood. However, for whatever reason (I think I was just impatient and in denial), I did not take the time to do that. After the sickening sound of the last snapped joint, I threw my hands up and started over with a different approach: steam bending.
I liked the walnut from the first iteration, as it would contrast nicely against the spruce of the soundboard, but none of the walnut I had was sufficiently straight-grained for steam bending and I was getting impatient: by the time I had reached this stage, the rest of the instrument was completed and I wanted to get this project, beloved and exciting as it was, off my bench. So I let go of my dreams of color contrasts and grabbed a chunk of ash from which I had cut the axle and drew a new design for the bow.
Sadly, this is yet another bit of the build from which I have only sporadic images, so description will have to do for much of its explication. Given that eliminating grain runout was now the goal (the bent wood approach would allow it, where butt-jointing only minimized it), I selected the most straight-grained section of ash I could identify and drew a pattern that allowed for continuous grain along the entire length of the bow, all the way through the handle. After a few iterations, I had one that succeeded at this, looked good, and also took advantage of the curve of the handle to minimize the stress of the bend, which was tight (less than a 4" radius, as you'll see labeled in the next pic). I milled a blank 10mm thick and then cut the pattern such that the "stick" of the bow would be 10mm square in cross-section. I then chamfered all four edges of this to make an octagonal cross-section; I wanted to leave the final rounding until after the steaming so that I might have a little extra wood to work with if there were any splits from the bending (this turned out to be a good idea).
Here is a shot of the bow in the bending frame ("r=95mm" refers to the radius of the form around which it is clamped).
Here, I've begun to round off the handle-end of the bow, but you can still see the octagonal cross-section of the stick.
This shows the slot cut into the end of the stick that is intended to keep the horsehair from spreading out too much. You can also see that the stick is rounded now and the end has been cut in a curved slant. Eventually, I drilled a small hole roughly perpendicular to this curve and drove a short brass rod through it such that the rod extended a few mm out the other side (opposite the camera view); to this the horsehair was anchored and tied off after a few wraps around the stick.
Here is the slot at the end of the handle into which the other end of the horsehair would be set. Once the hair was pulled into it, a shim of walnut was forced in behind, keeping the hair in place; the shim, being a press-fit, can be removed when it is time to change the hair.
Here is a shot of the shim blank, prior to being inserted and flush sanded to the ash handle.
Finally, here is the completed bow, finished with shellac, hair installed, and in position against the instrument's strings. The design ultimately was very satisfactory, allowing good sensitivity in pressure and movement along the strings, important factors affecting the instrument's timbre, while being firm, robust, and fairly easy to hold. Although small changes might be appropriate for different sized instruments, I expect future iterations of the rotola bow will closely resemble this.
That concludes my posts about the fabrication of the rotola! It was a long project and the most complex and challenging I've done so far, but very educational and rewarding. My final post on the rotola will cover setting the instrument up, small tweaks, and end results.


No comments:
Post a Comment