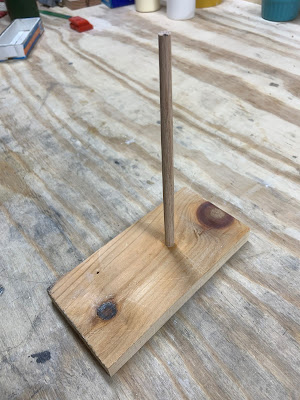
Monday, January 30, 2023

Rotola: The Nut

So far, I've talked about the rotola's construction fairly idiosyncratically, discussing what I'm doing as I'm doing it, but, apart from sharing pix of the original design, I haven't contextualized what I've done within the instrument overall or within the principles of chordophones generally.  We're coming to a point where a little of that background might be useful.  

On most stringed instruments, the string runs between two anchor points that keep the string in tension and across two contact points that define the length of the resonating section of string.  Thus:


Note that the  contact points are by definition between the anchor points.  This is true of all stringed instruments in one way or another, with variations in how their different jobs get done.  

There can be some further specialization, however, within these jobs.  One of the anchor points will usually have a mechanism for adjusting the string tension and one of the contact points usually has the additional purpose of transferring the vibrations of the string to a resonating body.  We name these different points according to their roles:  


The anchor point responsible for adjusting the string tension may be called a tuner, tuning pin, tuning peg, etc.  The anchor point that holds down the other end of the string, usually immobile, is sometimes called an end pin (in some instruments, instead of a pin, there is a hole into which a thickened part of the string catches).  The contact point that transfers string vibrations to the resonating body is usually called the bridge and the contact point that holds the other end steady is the nut.  Most string instruments have some version of all of these, although sometimes a piece might do more than one job, as in the bowed psaltery, in which the end pin also serves as a nut.  The most important job of the nut is to provide a solid point against which the string can vibrate, i.e., by being a rigid surface, it inhibits the string's movement as minimally as possible.  (This property is necessary for the bridge, too, but I would say it's first job is to transfer sound to the body.)

Whether the bridge and the end pin are located at the same end of the instrument or not is usually dictated by the structure of the instrument and how it gets played.  In violin, viol, and guitar family instruments, for example, the tuners and the nut are usually near each other and the bridge and end pins/holes are together at the other end.  But it can be the other way around, which is the case for the rotola:


More precisely, per my initial design:


So, as you can tell from both the end of the previous post as well as the title of this one, I'll be talking here about the design and fabrication of the nut.  

Despite the octagonal cross-section seen in the above initial design, as discussed elsewhere, I decided as I began to build the instrument to aim for a cylindrical shape instead; thus, the nut will need to be circular as well.  However, the grain of the wood comprising the nut, in this case walnut, will need to run perpendicular to the strings it supports.  As no trees grow with the grain in a circle (growth rings don't count, as the fibers are still longitudinal), the nut will have to be assembled similarly to the pinblock -- what I came affectionately to call pizza slices, as I struggled to get yet again perfect 22.5° cuts.  Using a bandsaw, this is tricky:


The one on the left, you see the cuts are too shallow and on the right, too steep.  These are just two of my many attempts to get the jig set right using scrap wood.  In the end, I finally got one close enough:


You can still see some small gaps, artifacts of having to use the oscillating belt sander to get the angles just right, but I had wasted a good deal of wood already, and my tools and my skill with them were not going to let me get more precise than this anyway, so I glued it up:


Next step was to round it off, which entailed first circularizing the center hole and then using that as a pivot to do the same with the circumference.  

I spent quite a bit of time laying out and fashioning a jig that would allow me to center and hold the nut on the drill press; unfortunately, I neglected to capture that work, but here is a shot of the completed center hole with the nut correctly placed on the jig:


The slots in the frame allow the jig to be bolted to the drill press table; the alignment marks have complements on the table and those on the nut then line up with the jig.  Using this system, I was able to place the 3/4" blade bit precisely in the center of the inner octagon and make a perfect pivot hole.  It's amazing what good marking up can yield.  

Next was to make a jig for circularizing the outside of the octagon.  Using a scrap bit from a practice axle, I set up a way to hold the nut firmly in place on the table of the oscillating belt sander sufficiently precisely at the radius I wanted:


The long edge allowed me to keep the whole thing square, which was the key to controlling the radius (from the center pin to the sander face).  Thus:


I was very pleased with the end result:


In working with the walnut thus far (this was the first part of the rotola that used walnut), I began to realize that, while it is a relatively hard wood, it's not as dense as a nut really needs to be.  My original plan was that the strings would be supported directly by the nut, draping across its edge (as you can see in the third figure, the one labeling the various string supports), but I began to think that the walnut was just soft enough that it could have a dampening effect.  Given that the rotola's strings should be highly resonant in order to create the sound I aurelize, this was a risk I was unwilling to take.  

I played with several ideas for solutions, including remaking the nut with ebony or maple on its edges or even fashioning a new one out of those materials.  However, in the end, I took inspiration from the bowed psaltery, which has a slim bar of brass on its bridge.  Brass is hard enough to support the steel strings rigidly, malleable enough to work with in a woodshop, and looks good, too.  

Having procured some 1/8" brass rod from my local Big Box Home Store, the next step was to mount it onto the nut's edge, most simply by cutting a groove into it.  As with much of this project -- indeed lutherie in general -- this would require making a jig.  Fortunately, I needed only modify the one I'd made to circularize the nut, standing it on its edge and mounting it to the router table.  After some trial-and-error, I came up with this:


A v-bit in the router could be raised (via the black and yellow handled adjustment shaft on the left) into the edge of the nut, then the nut could be rotated on its axle, creating a fairly straight and even groove.  Both the axle and the router bit are seen better from the below angle (seen from the other side of the fence): 


I was pretty happy with the result; it's not perfect, but more than good enough for a proof-of-concept:


Next, I wanted to taper the outside edge, giving a smoother transition for the strings on the end pin side (outside) of the nut.  After more trial-and-error, I came up with a setup that would allow some consistency:  


The rounded nut (here a practice scrap) rests on the bench, with a bench dog through its center hole (serendipitously the same size as the axle), then a guide keeps the plane at the same distance -- and thus the same angle -- relative to the nut; counting strokes and rotating the nut the same number of degrees as I worked my way around helped me rough in a taper:


These large facets (seen below in the nut itself) were smoothed by making smaller facets in between:


These were then blended and rounded over with sandpaper.  

Next step was bending the brass rod.  I expected that, in order to get a good fit, the rod should be wrapped around a cylinder that was somewhat smaller in radius than that nut itself, to account for springback.  I made a form, which turned out to be too large, then a smaller one -- 


-- which was still too large.  Rather than continue to make circles out of wood, I decided to look for ready-made cylinders, like cans of finish:


-- which turned out to be just right.  

I got the brass rod to a rough fit, cut it, and then taped it to the nut to see a) how well it would sit in the groove on the edge of the nut and b) how much pressure from the strings would be required to get it to sit straight and evenly in the groove.  


You can see some of the wobbliness, especially in the lower of these pix.  Masking tape was capable of holding the brass down fairly strongly, but I'm unsure if the strings (even considering that there are 16 of them) will generate enough power to keep it firmly in its slot.  That said, I decided those were problems to resolve another time and I needed to keep going to finish the nut.  

The last fabrication operation with the nut would be drilling the holes for the end pins.  This would require some accurate marking out:


Here, you can see I started by marking out the radii at 1/16th circumference (or 22.5°) arcs.  I'm using the seams between pizza slices as references, which, in turn, I will match up with the seams in the soundboard slats; this will then allow the end pins to line up perfectly with the tuning pins, which were also drilled in with an analogous method at the other end of the instrument.  Then, returning the nut to its jig, I used a compass to draw circles at 15mm and 20mm from center.  These intersections I then marked to indicate alternating drilling points, like so:


The places with the hash marks (or crosses) are to be drilled.  I drilled a few test holes in some scrap to see which of the candidate pins would work best (I had several ideas:  brads, screws, etc.) and settled on brass-plated twist brads (no pix yet; to be revealed later).  To keep the alignment consistent, I returned to the edge circularizing jig (the one I used on the oscillating belt sander and the router table), now mounting it onto the drill press and tipping the drill press bed 5° to give the pins a tilt away from the direction of the pull of the strings.  After drilling the holes, I ended with this: 


And that is as far as I'm taking this blog post.  I have since cleaned up the markup pencil and begun pre-finish sanding on the nut.  Still remaining for the nut is to be glued to the body, which I'm holding off on only because I have this nagging feeling that I'll regret it if I'm too hasty, and for the brass rod to get a final fitting (i.e., hand-bending to get as nearly perfectly circular as possible) and possibly to be glued (epoxy? cyanoacrylate?) in place.  

Next post I plan to be about the bridges, which I have just begun to experiment with.  After that, there will be very little left of the complex, inventive parts of this build:  I'll need to make a support for the instrument (basically a couple of Ys to hold the axle), glue up whatever isn't yet glued and apply a finish (very likely shellac), put the strings on and tune it, and make a bow (the design of which is still unclear).  

Saturday, January 14, 2023

Rotola: An Instrument Takes Shape

In my last post, I focused on finalizing the basic frame of the instrument:  two blocks at each end of an axle.  With that complete, and having given up on further refinement of the soundboard slats' radiusing, it was now time to attach the latter to the former.  This post will cover those steps.  

Before I could glue the pieces of the soundboard to the frame, a few things needed to happen to them.  First, they needed to be fit, i.e., cut to final width (or more properly, degrees of arc) and jointed along their long edges so as ultimately to create as unified a cylinder as possible.  Once that was done, the soundholes needed to be cut.  

Jointing was done in several steps.  First, one edge was selected as most straight; this was then made as perfectly straight as possible by either sanding or planing or both.  Given the thinness of the soundboard the wood was brought to the cutter, rather than the usual other way around:  for sanding, I used sandpaper attached to glass and, for planing, my #7 Stanley jointing plane was placed upside down in a vise and the piece of soundboard was moved along it.  Care was taken that the edge being jointed was perpendicular to the tangent of the cross sectional arc (or coplanar with the radius) so as to join as tightly as possible with the adjacent slat.  Hopefully, the below diagram clarifies this statement:


That done, a wheel marking gage was used to mark a parallel edge just a bit wider than the final width, e.g., given there were eight slats, each slat would be 22.5 degrees of the cylinder's circumference, so the edge would be marked at 23 or 23.5 degrees; translated into millimeters at the outer radius of the pinblock, this was something like 45mm on the wheel gage -- I don't recall exactly.  The excess would be planed down, then, if necessary, sanded to fit precisely with the adjacent slat with the same method as the first side.  Here I'm test fitting two pieces of the soundboard, taped to the frame:


Next, the eight soundholes needed to be cut.  This would normally be a tricky operation, made more difficult by the curve of the soundboard sections.  A typical way of doing this would be to drill holes into the center of each strip and then connect them by cutting with a coping saw or knife, risking splitting the thin and delicate spruce, requiring much clean up, and making it difficult to get them all identical.  Alternatively, one could make plunge cuts with a router or router table; this would require yet another jig -- probably a fairly elaborate one -- and, again, the curve of the soundboard would make it difficult to keep the soundboard stable during the operation.  

After much deliberation, I decided instead to route out half-holes on each side, which would then create soundholes between slats.  There were several advantages to this:  it would be a very simple operation on the router table and require only stops on the fence, rather than a jig, it would be simple to keep the soundholes neat, straight, and centered, since they would register to the precisely jointed edges rather than a curved face, and it would reduce the surface of the edges being glued (and thus save time during a tricky glue-up).  

I spent a fair bit of time testing with scraps and getting the table and fence set up and then proceeded cutting sixteen half-soundholes, two into each of the eight slats.  Rough off the router table, they looked like this:


As you can see, the routing left some rough edges, especially at the ends of each hole, but these were easily cleaned up with sandpaper.  Too, there were a couple of holes I screwed up, one in which the router bit climbed out of the intended hole and bit a little too far into the spruce and one where the bit chipped out the edge of a hole.  I managed to repair these passably well by cutting tiny bits of spruce, matching the grain as best I could, gluing them carefully into place and the filing and sanding them to the correct outlines of the soundhole.  

In the end, I was pleased with the overall results and, if I go with this soundboard and soundhole design again, will probably use this method to cut the soundholes.  It was a bit fiddly, but I think less so and much easier to make consistent than the two methods I described above.  

So, now I was finally ready to begin gluing up the body of the instrument.  I had numbered the strips to keep the jointed edges together:


Six of the eight are shown here.  Number one is off camera, either taped or already glued to the frame; number eight is yet to be finalized, as I decided that would be easiest to do once the rest are on.  (You may notice in the first pic above that the pinblock sections are numbered as well; they correspond with the slats.)

Gluing arc-cross-sectioned strips of wood to cylindrical hunks of wood using square-faced clamps was not easy.  I tried several configurations, one of which was this: 


Note how the two clamps on the right cross each other, each taking a basically diametrical orientation, which is the only way a flat clamp can get any purchase on a cylindrical surface.  The one on the left is serving to bolster the rope holding the soundboard down, as I could not get enough radial pressure with the rope alone; that experiment was not repeated as subsequent strips were glued.  In the end, I solved these problems by making custom, cork-lined clamping cauls (excuse the accidental alliteration); although I don't have pix of these glue-ups, the cauls show up some of the next steps.  Here is the instrument with more slats attached:


You can see the clamping cauls being used as supports there.  Next is a view of I believe the same stage (six of the slats glued) showing the soundholes:


The end result was not what I had hoped:  most of the slats had radii tighter than the cylinder they made up, which meant that, rather than being perfectly round, the tube of the instrument was slightly lumpy.  So, instead of having a cross section like this:


It's more like this:

This effect was further exaggerated by the need to scrape and/or sand some of the glue joints.  It is, however, largely an esthetic concern at this point.  Unquestionably, the unroundness will affect the sound of the instrument, but my goal here is to see if it will simply hold together and produce something like the sound I have in mind; presuming it does, I can experiment with the effects of structure on timbre on later iterations.  Presuming I do so, I have some ideas as to how to increase the chance of ending up with a nice, smooth, round cylinder, if that seems like the shape to pursue.  

One other outcome of this stage was learning something about the acoustics of a stopped, cylindrical soundboard.  The tap tones for the individual slats were decent; they were clear and reasonably sustained.  As I added each strip to the frame and glued them into an ever larger resonating surface, they retained this quality and I was increasingly excited about how the whole would sound.  However, after gluing in the final piece, the soundboard deadened dramatically; it is now much stiffer than I expected.  It has some resonance, but nothing like I had hoped.  In retrospect, this makes sense, but I'll share my speculations on that elsewhere.  Ultimately, this design -- a capped, tubular resonating body (as opposed to an open or stopped-at-one-end chamber, like a marimba) -- may not work.  I expect to experiment further with it later on.  

With the body of the instrument assembled, it was time to drill the holes for the tuning pins.  My original design (along with being octagonal and having both the soundholes and the bow at the other end) had only eight strings.  As a reminder:


Back when I was assembling the pinblock, I realized I had grossly overestimated the space I needed for the pins.  My ultimate vision for this instrument is of something much larger, with, say, 30 or 40 strings; being able to put more strings on this prototype would allow for a better proof-of-concept, so I decided to set it up for 16 strings rather than the original eight.  

After doing the layout for drilling the holes (which can be seen in one of the pix below), I needed to create a drilling jig.  Not only do the pinholes need to be perfectly radial (i.e., run from the surface of the cylinder exactly toward its center), but they also need to be tilted a bit along the longitudinal axis to counter the pull of the string; I decided, more or less arbitrarily, on five degrees.  (You can see this tilt in the pic above of the original design.)  To accomplish this, I repurposed the clamping cauls and set up a jig on the drill press thus:


The carriage bolts secure the jig solidly to the drill press table and the extension helps stabilize it.  In the next pic, it's easier to see the five degree rake.  


Setting up and doing the actual drilling was quite nerve wracking:  if I screwed this up, I'd have to scrap what I'd built so far and start over and, having spent more than two years on this project already, that would be a bad thing.  So, following the maker's adage "measure twice, cut once" -- or in this case, measure many times -- I forged ahead with a trial hole, which, much to my relief, came out exactly as planned.  Testing it with a pin: 


You can see the layout marks for the pinholes here; "x" marks the spot!  The first of sixteen holes being successful, I plunged on (sic) and completed them.  


The next step is to create, assemble, and attach the nut:


The nut also has had some significant redesign, but I will cover that in the next post.  

Thursday, January 12, 2023

Rotola: Compromises and Progress

My last post about the rotola focused on the production of the cross-wise bent strips of spruce that would ultimately comprise the cylindrical soundboard.  Of the 14 months since that post, 10 were spent in frustrating, off-again-on-again experiments trying to get the right radius in the strips without cracking them.  After gaining some confidence with scrap pine, the Sitka spruce that I had been husbanding for the "final" steaming ended up with more strips cracked than not.  Swallowing my pride and scratching my head, but with undimmed determination, I brainstormed with a luthier at the timber supply company I like to go to about new approaches.  We decided to try thinner stock (the original stock was 4mm; the new is 3mm), which helped with the cracking, but now my molds were too tightly radiused (the thinner stock rebounded less after drying).  My near obsession with getting the radius perfect became a running gag in my family and, eventually, I found that even identically milled and carefully steamed and molded strips varied too much from one to the next to produce a consistent radius using steam bending alone.  

In the end, I threw up my hands and used a heat gun to get each strip to something close to right radius.  As most of them were too tight, flattening them with heat and a little water worked to a degree -- although I snapped a few from too much confidence and too little heat and moisture.  When all was said and done, I could only get a few of them to exactly the right radius, so the cylinder I was ultimately able to make was far from perfect.  As I have said, though, this is a prototype and, as such, I don't expect it to be perfect (even if I want it to be).  

But I'm getting ahead of myself.  Let me pick up at the point where I decided to go with the strips I had.  Next step was to create an axle.  Just as a reminder:

(This original CAD workup was octagonal in cross-section; the current version is cylindrical, but the location and function of the axle is the same.)

Unfortunately, I did not photograph any of my initial work on this part (spaced it), but I will describe it.  The axle needs to extend far enough from the ends of the cylinder to allow for a support at each and a crank handle at one.  Obviously, it needs to be round (cylindrical) at the points of support, but it does not have to be so within the instrument.  In fact, I realized that the shoulders of a square cross section could help relieve some of the compression stress on the soundboard by allowing the pinblock and endblock to rest against them (if this is not clear, I do have pix of this aspect below).  Further, as the original mahogany dowel I had purchased to serve as the axle was not sufficiently straight, I decided I needed to make my own from scratch.  

After thinking about what type of wood would best suit as the axle, I settled on ash for its strength and straightness of grain and purchased a bit from a nearby timber supply company.  I started with some oak offcuts to practice my cutting and planing on and was able to produce some satisfactorily square cross sectioned blanks, then made the final from the ash.  Next was to cylinderize the ends.  Again, practicing on the oak blanks, I used a quarter round bit on the router table for this; once I had my setup right, I ran the ash through.  This process went surprisingly well, which was a great relief in the context of my struggles with the soundboard.  This was my end result:


Here is a shot of the major parts laid out together:


Note the endblock blank on the left still needs to be cut to a circle and both it and the pinblock need to have center holes cut to the correct diameter.  The soundboard strips have been taped together to get a rough sense of how they will join, but have not been properly fit.  


A close up of the endblock:


...and the pinblock:


Note the pencil marks aligned with the inside edge of each block; those represent the shoulders to be cut against which each block will eventually rest.  

Next step was to round off the endblock blank and to cut the center holes in it and the pinblock.  Again, I didn't get pix of cutting the endblock to a circle, but I used the same jig that I used for the pinblock (see the top of the last post).  That done, cutting the center holes had to be extremely precise, lest I build in a wobble.*  The process was very fiddly and I ended up getting absorbed in it and forgetting to photograph it, as well (I will, however, show in an upcoming post the very similar process of cutting the center hole for the nut).  Here are the results:

Endblock: 


...and pinblock: 


I was very happy with these results; despite my post hoc approach, the enlarged holes were concentric with the blocks' outer circumference. 

Next was to cut the shoulders of the axle.  Here you can see the slope left by the router cutter and the nicks I cut with the ryoba saw to mark the shoulders:  


I then chiseled in the shoulders roughly:


And:


Followed by more detailed chiseling:


I was then able to use the endblock and pinblock to finalize the shape for a nice, sufficiently tight fit:

Honestly, I'm pretty proud of the pinblock side.  

Next, I glued up these three parts to create the dumbbell structure to which the soundboard will be attached:


In order to keep these updates in bit-sized (or at least single-serving) pieces, I'll put the subsequent steps -- fitting, shaping, and gluing the soundboard, drilling the pin holes, and constructing and shaping the nut -- in the next post.  


* If I make more of these in the future, I will create the center holes first, then round of the circumference to guarantee concentricity, but the nature of this experiment meant that I ended up building the pinblock, endblock, and nut more or less from the outside in.  

Monday, February 7, 2022

On Turning 60

It feels like, for most people, birthdays with zeros in them have greater significance than others and, for myself, even-numbered "zeroth" birthdays are even more so, demarcating seasons of life:  20 for adulthood, 40 middle-age, and 60 old age.  My past changes of seasons have been accompanied by great joy and anticipation for the future, but, as 60 looms in the dregs of this pandemic, my feelings are more complicated.  

I've always had big parties for such birthdays.  For my 20th in my hometown of Albuquerque, NM, I was embedded in a vibrant and engaged network of musicians, burgeoning artists who knew what they wanted out of life and were going after it with the verve of the young; that party is one of my fondest memories (what I can remember of it, anyway).  When I turned 40, I was in another world, the New York City suburbs, and my wife at the time managed against all odds to surprise me with a party and friends from across the country who came to celebrate my (hopefully) halfway point; it was one of the most joyous moments of my life.  

I've always imagined that, for my 60th, I'd throw a big bash:  host my oldest and closest friends and laugh and celebrate what a long strange trip it's been.  But, of course, that can't be right now, given the pandemic.  Naturally, I'm sad about that, but I'm really sad about it, like more than makes sense on the surface of it, and I've been thinking about why.  When I think about birthday parties, when I get a warm feeling in my chest over memories of past celebrations, it's not about the trappings, the cake and candles and singing, but the joy I feel being with people I love and having a sense of being myself, of being okay.  There's something about the context of having everyone around me be someone who knows me and is okay with me that feels safe in ways I rarely do.  

In my studies in psychology, I've found some insights into this.  For example, Peter Fonagy, a clinical psychologist and researcher in the UK, has explored how and when theory of mind develops -- how do we come to see ourselves and each other as thinking things (as opposed to moving but unsentient objects)?  He argued that an infant comes to see herself as a thinking thing when she sees her mother interacting with her as a thinking thing:  in other words, we literally discover ourselves in the eyes of another.  

My default sense of myself has been as someone with something wrong with them, something mismatched or broken, feeling like the odd kid, and often that sense has been reflected back to me when I look into others' faces:  peers, teachers, colleagues, random persons I interact with.  Once in a great while, though, I see mirrored in someone's eyes a person of worth, someone who is matter-of-fact-ly okay.  And, even more rarely, those eyes belong to someone who goes out of their way to spend time with me, and who seems to see in my eyes the esteem I hold them in.  As I've gotten older, I've learned that these people are precious, that they help me get to myself, to find and hold onto a self I want actually to be, and that with them, I can stay myself as I navigate a world filled with people who don't see me.  

So, I think that's why not having a big 60th birthday party feels so hard:  missing the chance to be with my friends, to see in your eyes a person who is okay, but even more importantly, to tell you how grateful I am for you, that without you I would never have become the person I am at 60, someone I'm glad to be.  

Thanks.  

Sunday, November 14, 2021

Two Skies

It was one of those days where you realize that "sky" is just another human construct, that the sky starts wherever the ground ends.  Sky isn't just something way up out there, but also something that your head is swimming in all the time. 

- John Green in The Anthropocene Reviewed, pg 225

I spent the conscious part of my first 10 years east of the Mississippi* and grew up under a sky that just was -- it did stuff, often unpredictably, and sometimes cool stuff.  The sky was where the weather lived.  It was where my dad worked (he flew fighter jets for the US Air Force); it was where I sometimes dreamed of following him, after reading children's biographies of the Wright brothers and building machines that flew on hope using the bamboo poles that came in our new carpet.  It was where my kites sometimes went and were my dad's model planes usually went.  The sky was where the indecipherable stars were and from whence fathoms-deep snow fell.  It was where the sun strolled and behind which it was sometimes obscured and, once, the stage for its disappearing act.  Like most things when we're kids, the sky was just so, a thing that was there, the way it was, unremarkable until someone remarked on it, seemingly as ambivalent to me as I was inattentive to it.  

Then, concurrent with my father's return for a tour in Vietnam, we crossed North America's Great River to make a home a bare 15 miles inside the edge of the Mojave Desert in southern California -- and suddenly the sky was different.  What made me notice was not the sky itself, but the lack of anything mediating it.  The old accustomed horizon defined by nearby trees, hills, narrow streets, or neighbors' second stories had all vanished, leaving the pale dusty blue to fill the emptiness.  At ten years old, I couldn't have named the difference, but I felt it:  a boundlessness that can only come living in a place where you can always see the edge of the world.  

In the desert, I started my time playing under the sky, chasing lizards and jumping ditches on bikes and mapping out the "unexplored" territory between the base and the Mojave river, boundlessness in the background.  Two years later, the military sent our family to Albuquerque, New Mexico where my time under the Big Sky would settle into a groove.  We lived near the edge of a plateau on the west side of the city in a house with a porch overlooking the valley and the dramatic Sandia Mountains beyond.  My attention expanded with my adolescent capacities and I began to notice more particularly what was going on in that vast sky.  

There, one can watch entire storms, top to bottom, east to west, wend their way across the desert floor.  Curtains of rain -- locally called vigras, as I recall -- hang from the clouds but evaporate in the air in mocking tragedy above the desert floor.  Thunderheads spread their anvils like empires, lit from beneath by the setting sun's fires of war, as evening burns down into sparkling nights.  Two-mile high mountains become speed bumps over which cumulostratus clouds tumble like softly breaking waves.  Usually, cloud bottoms there are about ten or eleven thousand feet, making the sky feel very far away indeed, but once in a great while, they drop, hiding the heights, scraping the world flat like a bottom trawler from Elysium and, though the horizon remains as far away as ever, nothing lives above it.  

In and around the city, the night sky is as light-polluted as in any Eastern town, but, drive for an hour or two in the right direction and, slowly, tiny bright worlds beyond the sky blink into existence.  Go far enough in the winter, when the atmosphere is clean and crisp, and the Milky Way is so bright that you can see the ground by it.  Constellations get lost among the crowds of their quieter brethren; a passing cloud can be easily outlined as it obscures bits of the rhinestoned celestial sphere.  Any sliver of moon glows like a burning brand and its fullness is almost blinding compared to the gentle enfoldment of luneless starlight.  

I lived in Albuquerque for almost fourteen years and consider it home, as much as any Air Force brat has one.  My parents lived there nearly half a century and traveled, leaving and returning to it multiple times, always under the enchantment of my father's wonder of its sky.  In the first decade or so of living there, he flew the city's surrounds more times than I can know and chose the last house he and my mother lived in for the view of what was above the ground.  I cannot visit now without looking up and thinking, "this is my father's sky."  

-----

Like New Mexico, I never thought to come to Maryland; my path here was, as has been the case most of my life, wandering and characterized by unanticipated futures.  After I left the West, I often romanticized (as above) the vastness, blueness, and starriness of its sky to my East Coast friends.  In the blinding nights of Miami and New York City, I lamented the replacement of the pinpricked dome for a hazy orange one and, lost among the brick and brutalist towers of East Coast downtowns, a flat horizon for a vertical one.  The DC suburbs, however, had a few flavors of my adopted home town:  a tendency to build out rather than up -- indeed, there is a height limit in the District -- and a remarkable accessibility of the country, such that less than an hours' bike ride or a quarter hour by car can find a rolling quietude and relative emptiness in which the heart may take some peace.  

As the exigencies of my life kept me in Maryland, my yen for the sky kept me looking up and, more and more, I found myself surprised by what I saw there:  layered oceans of clouds, not miles up, but mere thousands or even hundreds of feet away; sun pillars, sun dogs, parhelic arcs shimmering and ephemeral; castle wall squalls and level grey cloud mantles.  There is always a show in the sky here and it is never boring.  

I've seen more kinds of clouds here than I knew existed.  Of course, there are fluffy cumulus and gloomy stratus, feathery cirrus and towering nimbus, but also pendulous mammatus, magnificent gravity waves and humorous Kelvin-Helmholtz waves, updraft holes, microbursts, and roll clouds.  And these embedded in large-to-huge weather systems like tornados and hurricanes and derechos, all of which I've seen and lived through here.**  Except for cloudless days, I literally never look up without finding some enchantment made of water vapor wending its way past my ground-perch.  

Even absent of clouds, the sky here parades a kaleidoscope above me.  From the sapphire blues of September -- which, astonishingly, compete fairly with those of New Mexico -- to the pallid wash of a humid summer day, to the pinks, oranges, yellows, reds, indigos, and even greens of a sunset almost any day of the year, I've never lived in a place with such a color wheel above me.  Rays crepuscular and anticrepuscular are to be seen as the sky lowers and Venus' belt lifts, while sunrises burst and sunsets crash in the summer but linger luxuriously through the horizon's naked trees across the winter.  

I'm grateful for our five months of summer, even as I am jealous for more of it, but the weather in the remaining seven of not-summer still draws me into a wondrous fascination, however unpleasant it often is.  During the cool seasons we get, of course, some snow, which I genuinely enjoy (so long as I don't have to move any of it), but I've learned that there are nearly endless variations on frozen and semi-frozen precipitation that other places I've lived seem to lack.  Sleet, graupel, freezing rain, all varying degrees of nasty to be caught in, are nonetheless really interesting both as weather phenomena and as things you might find on your front porch.  I had no idea that there were so many kinds of frost.  Hail is my greatest anxiety -- and not limited to cool weather -- as I have no garage, so it therefore ever-threatens one of my greatest treasures, my car; enough so, that its interest for me as a meteorological marvel is eclipsed by my worries over dimpled bonnets and boots.  

Just as with any metropolis, nights here are mostly dimmed by the brightness of the cities, yet, getting out into the darkness of a country night turns out to be less difficult than it feels out West.  Probably due to the relative nearness of the horizon, it's not so hard to find a place where one can see some of the Milky Way or for enough stars to come out to make identifying constellations a challenge.  It is not like the repleteness of a winter desert night, but it can be enough to recharge the batteries of one's soul.  

I've been in Maryland now for longer than I've lived anywhere else; I anticipate that I will die here.  I deeply love its sky, perhaps more even than that of my desert roots.  A friend of mine is fond of saying, "Maryland gives good sky," and right she is.  I grew up beneath my father's sky, but the endlessly changing sphere here sings to me, making music for my eyes like an infinite organ grinder, ever restless, even when at peace, churning and breathing like the underbelly of an insomniac dragon, ever lit from unexpected angles, at once sparkling and gloomy, purpling like royalty or a bruise, shining as only the firmament can.  

-----


* The nitpickers among you will remind me that I was born in Texas and lived for two years in Arizona.  Fair enough; however, the only memories I have that might possibly be ascribable to that time are indiscernible from dreams and imagination.  

** The hurricanes that have come through the DC/Baltimore area, of course, are faint shadows of Hurricane Andrew, which my brother and I survived on August 24, 1992 in Miami.  

Tuesday, November 9, 2021

Rotola: Yeah, Maybe, Maybe Not

In my last post about the rotola -- more than seven months ago now -- I made optimistic descriptions of what would come next and how I'd get those things done.  Well, things have gone well in some ways and not so much in others.  My plan had been to post again once I had the eight strips of the soundboard fully bent, an endcap to attach them to, and an axle to run through the whole thing.  Once I got to the bending part, though, things stopped going according to plan and, given the time elapsed, it seemed like I should post an update, regardless of progress.  

The next step after I left off was to round off the pinblock.  Unfortunately, the best tool for that was one I did not have:  a power sander.  I had had my eye on another Triton tool, recommended by the same YouTuber who sold me on the router I bought, but when I finally had enough cash set aside to order it, it was out of stock.  It finally came in May, though, and I got straight to work making my octagonal pinblock round.  This entailed making sure the center hole was well-centered (it was) and creating a simple jig for keeping the pinblock the right distance from the sanding belt, thus:


I didn't have a dowel the right size, so I made this oak one by hand; I was very pleased with it.  With my new dowel stuck squarely into a piece of hard scrap, rounding the pinblock was quick work:


Now I was finally able to test fit the piece from the first steam-bending test (see previous post) to the pinblock to see if the radii* of the molds I'd made previously were right.  The result:


Nope.  

So, I needed to create a new set of molds.  Given the tediousness involved and mess produced by making the first set of molds (also see previous post), I made a router table using the fancy new router I had previously acquired (indeed, I purchased that model specifically because it works so well under a table).  This went fairly well, if slowly and in fits and starts, and resulted in a very functional table that I'm pretty happy with: 

The router plate and stand are from Rockler; the former I'm happy with and the latter I'm impressed with.  The top is two sheets of 3/4" MDF glued together, making it stable and pretty flat and I ran stretchers across the bottom, which you can't quite see here, to make it very flat.  It's finished with several coats of shellac, so it's hard, and rubbed with Renaissance Wax, so its slicker than snot.  The fence is a piece of angle aluminum and two pieces of oak, held in place by the T-track in the tabletop and T-track bolts with hand knobs, hidden behind the fence in this view.  The T-track is screwed place, rather than glued, so you can slide it back:  the screw holes are several inches apart, so if you slide the track out one screw-hole, you can extend the fence off the back of the table by that distance, expanding the depth of the fence significantly.  I spent quite a bit of time planing and shimming the oak so that the two pieces would be both coplanar and square to the table (I learned too late that angle aluminum is not necessarily square).  I anticipate at some point in the future when I'm better at such things that I'll rebuild the fence and possibly the table to make everything more precise, but it meets my needs for now.  

With the table built, I was able to make new molds with tighter radii and do it faster and more accurately than what I did hand routing the first time.  Indeed, the concave half took me about an afternoon, whereas I spent literal days on the first one.  I did not record the process, but I can describe it simply enough:  Using the fence, I started by routing out the edges of the concavity, the shallowest and outermost sections.  The router table cut much of the work in half by allowing the setup for one side to be identical with the other (by hand, I'd had to set each side individually); it also made the actual routing faster, as I could guide the wood across the bit steadily, safely, and confidently (as opposed to moving the router carefully and wobbly across the wood).  I could then iterate this, moving closer to the center and raising the bit little by little, until I had the curve roughed in.  Too, because of the precision the table allowed, I could cut with a "higher resolution," leaving less needing to be sanded to get to the final shape.  (For the convex half, I used the same method as before, roughing it out on the bandsaw and then rasping and sanding to the final shape.)  

In theory, at this point I could move on to steaming, but I realized that I expected to do enough steaming that it would be worthwhile making a dedicated steambox, rather than relying on turkey roasting bags as I did for my first attempt.  So I built one:


Steam comes in from the kettle via a 3/4" heater hose and a brass fitting. 

The front has a gasketed, hinged door with a spigot to control the rate at which the steam escapes. 
And, of course, one needs a steam source, which is the same one as I used previously, fitted with an adapter I made out of Baltic birch ply to connect the heater hose.


It's wildly overbuilt, with screws and ample glue and sealed with spar varnish.  It does have one leak at the intake end, which I may or may not fix; condensation needs to get out, as well as the steam, so really, it's fine.  Like everything on this project -- actually at this stage of my lutherie -- it's an experiment.  I did look at countless YouTube videos, online posts, and paper magazine articles before going forward with this and my steambox looks pretty much (in some cases very much) like many others out there, which gives me some confidence.  

At this point, it's now late September, so it's taken me six months to get to a place where I can finally start bending some wood.  However, before I risked my precious Sitka spruce (it's not really precious, at $35 a guitar top, but it feels that way, given that it's not scrap), I wanted to run some tests on the system using scrap, so I spent several nights cutting strips of construction lumber into quarter-sawn strips 22" long and 4mm thick (the widths were generally about 1 1/4" or so, but that dimension didn't matter).  I ran a few steam tests and they looked good, drying out almost perfectly the radius of my pinblock:


Most satisfactory!  

Now, I feel confident enough to try my Sitka spruce.  The first result is very encouraging and fits as above right out of the molds.  However, after a day or so of further drying, it loses curvature and is too flat.  My first thought is to make a yet more tightly radiused set of molds, but it occurs to me (not least because I'm not excited about mold making, however expedited the process may be) that I could create a drying jig that keeps the newly unmolded strip at the same radius while it dries.  Accomplishing this took some work:  I discovered that my strips were not all identical widths, so I had to bring them to true; I then learned that the stock from which I cut my jig was not perfectly milled (by me), so I spent some time refining my measuring and planing techniques.  But, after a few iterations, I settled on a design and built a sufficiently accurate jig:


It's very simple:  I used the router table to cut a dado to exactly the width of the freshly de-molded strip into which said strip is pressed.  It worked better than I had hoped, with the strips not only retaining their radius, but shrinking just enough across the grain to release themselves from the jig (they're a tight fit to start).  Now, I could get to work -- and I did.  As of this writing, I have steamed six of my strips.  

Three of them have cracked.  

I have, of course, experimented further with my technique, soaking the strips longer (two-to-three days) and steaming them longer (30 minutes to fill the steamer; 90 minutes of steaming the strip).  I cracked strips #3 and #4 as I played with these parameters, then strip #5 came out perfectly, so I thought I'd sorted it, but while molding #6, I could hear the heartbreaking hisssss-pop of the grain splitting as I clamped it down earlier this evening.  Batting .500 is fabulous in baseball, but it's unsustainable in lutherie.  

For next steps, I have a couple of options.  I'm thinking that one reason the strips are splitting is that the mold is too cold and the strips cool too quickly once they come in contact with it; it often takes me a good 15 or 25 seconds to get to tightening the clamps, during which time the center of the convex half rests against the spruce, cooling it in that one spot.  Not all of the cracks bear this out, though, as some strips have split well off center.  Still, I'm going to try warming the mold with a heating pad before putting the steamed strips in to see if that helps.  I'm also working on a press to push and hold the two mold halves together relatively quickly, then leave me time to cinch everything up with clamps.  

It's possible, of course, that bending thin spruce perpendicular to the grain (most wood bending is along the grain) just doesn't work.  It may be that the properties that make it a great tonewood render it too brittle to be bent in that direction.  If so, the best solution may be to go back to my first idea of a faceted cylinder; my original vision for the rotola has a large diameter, say, 10" or so, and dozens of strings, each of which has a facet/soundboard.  The strips of soundboard would be narrow enough that making them round would be unnecessary; instead the challenge would be getting the angle between each facet right so they join evenly, but that might still be more practical than trying to bend the wood.  

So, from here I intend to continue experimenting.  My goal with this project is to produce a proof-of-concept, not a finished instrument (although I will confess to plenty of fantasies of the latter).  I don't even know yet if this thing will make the sound I want or how to tweak it to do so if it doesn't.  No other option but onward, into the darkness!


* I say "radii" because, in order to account for the thickness of the stock being bent, the mold halves are about 4mm different, inside to outside.  

Friday, May 7, 2021

Days of the Virus: 412

Last Friday, April 30th, I hung up with my last patient of the day and ran down the stairs from my home office to hug my daughter for the first time in almost 14 months (she had come for the first visit in nearly that long and was waiting until my session was over).  Even now, days later, it still brings tears to my eyes to think of how much I missed her.  

The day counter I embedded in one of my early posts about the pandemic read almost exactly 412:  I started it the hour of my last in-person patient, March 14, 2020 and I stopped it moments after that first hug with my daughter.  Four hundred twelve days:  days of hopefully expecting this thing to be over quickly, crushingly discovering that it would not, anxiously wondering how long it would last, impatiently waiting our turn for vaccines, and, now, being confusingly grateful for our safety and aghast at the horrors SARS-CoV-2 is still wreaking.  

The pandemic is not over, of course.  Countries' healthcare systems are still collapsing across the globe.  I know of two friends-of-friends killed by COVID-19 in just the last few weeks.  What has happened in my family's circumstances, though, is that we are all vaccinated and past our post-shot waiting period, so we can cautiously re-venture back into a world that we've become accustomed to fearing, and can no longer meaningfully call ourselves isolated, quarantined, or locked down.  I fear less both for myself and for what I might bring home to my family.  I still wear masks in public, but I can be in public.  I have to be mindful not to offer a friendly handshake when introducing myself to a stranger, but I do meet them.  It still is anxiety provoking to go anywhere outside my yard, but I remind myself that I can go -- and I do go, anxious or otherwise.  

The year 2020 was vicious not just because of COVID-19.  The Great Ambivalence my country continues to suffer was only exacerbated by the pandemic and the anger and frustration between Team Red and Team Blue escalated to new heights, ratcheting up the pain like a nationwide replay of Milgrim's obedience experiments.  Government dysfunction at the federal level aggravated problems with food and healthcare infrastructure, highlighting the divide between the Haves and Havenots, between Whites and People of Color, between the I-Got-Mines and Everyone Else and it scrambled the rollout of vaccines into a near free-for-all.  I think few of us are sad to see the backside of 2020.  

All of that makes the phrase "back to normal" a non-starter.  We still have the same racial issues and government paralysis we did a year ago, even if we can point to some evidence of change.  Whole sections of our economy have been profoundly undermined -- a walk through any downtown will tell you that.  These are the new normal.  But there is still a "back to" to get:  back to life, back to being with each other, back to what makes us human.  

So far, I've had at least one patient per day return to in-person sessions.  Each meeting, it feels simultaneously very strange and reassuringly familiar.  (Emphasis on the "strange" at first:  my first in-person session, I felt so anxious that I was seriously derealized for the first five or ten minutes!)  Yet every session reminds me that we are not alone, that this is not a computer simulation, that we are real people living real lives doing real things feeling real feelings.  And that seems about as close to "back to normal" as we need.